Incident Management
Status Update Templates
Customize and standardize your status updates
Status update templates simplify and standardize incident status communications. This feature frees up time during incident response and keeps stakeholders informed with consistent, detailed context.
Availability
Required User Permissions
If you have one of the following roles, you can create and edit status update templates:
- Manager
- Global Admin
- Account Owner
You can use a status update template during incident response with any role.
Create a Template in the Web App
Product Limit
- Navigate to Incidents Status Update Templates.
- Click New Template.
- Enter the following information in the fields provided, then click Create Template:
| Field | Value |
|---|---|
| Name | Enter a name for the template. |
| Description (optional) | Enter a description for the template. |
- Enter the following information in the fields provided:
| Field | Value |
|---|---|
| Message | In the Message template section, enter your desired text. This text appears in push, email, and SMS status update notifications. |
| Subject | In the Email template section, enter a subject line. |
| Body | In the Email template section, use the rich text editor to customize the default email status update notification body. Refer to the Fields in Email Notifications section for more information about including dynamic content. |
 Message template
- Click Save. Before saving, you can click Preview in the top-right at any time to view how the message appears in each notification channel.
Fields in Email Notifications
Email status update notifications can dynamically include information about the status update or incident. You can select standard fields and custom fields.
While editing the content of the email status update notification in the rich text editor:
- In the Fields panel on the right, click to copy the field to your clipboard.
- Paste the field into the appropriate place in the email template.
The field appears in the email body between double curly braces, for example, {{ status_update.message }}.
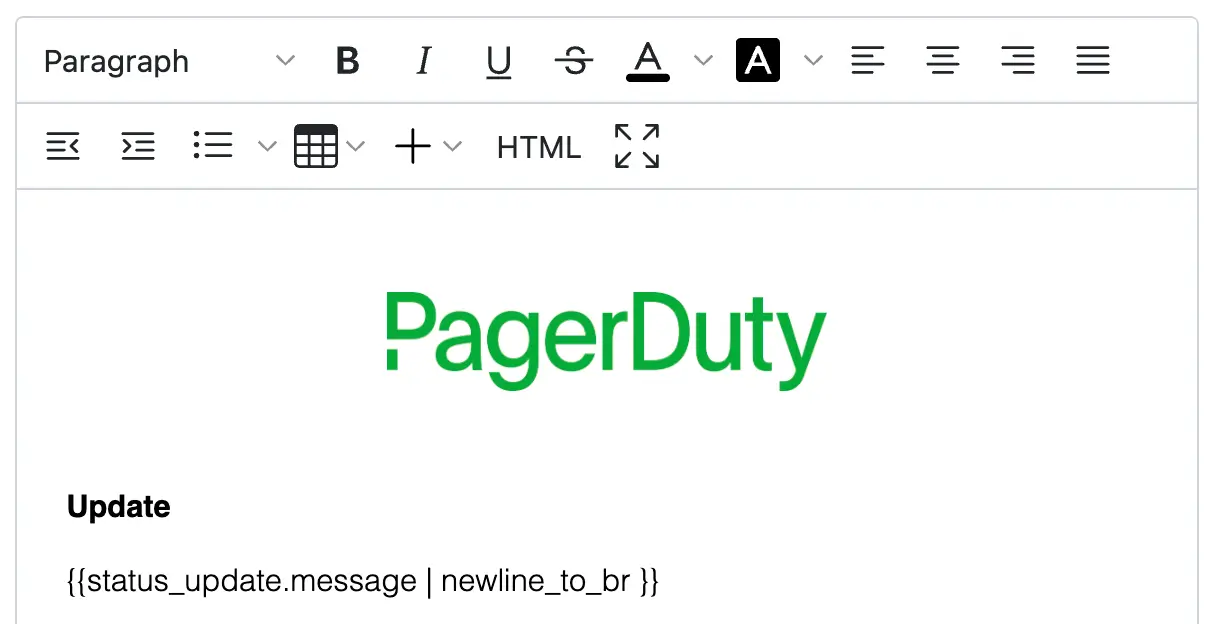 Status update message field
The most common fields are listed by default; however, you can also enter a term to search for a more complete list of objects and their associated attributes. Refer to the FAQ section for an exhaustive list of supported fields.
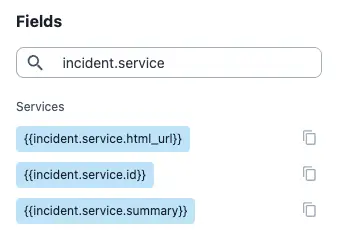 Search fields
Support for Liquid Templating Language
If you want to create conditional communications, status update templates support the Liquid templating language across all configurable fields, including Message and email Subject and Body.
When referring to fields inside a Liquid tag, omit the double curly braces {{ ... }}. For example, the following snippet transforms the incident title to uppercase for incidents with a "P1" priority, and otherwise leaves it unchanged:
{% if incident.priority.name == "P1" %}
  {{ incident.title | upcase }}{% else %}{{ incident.title}}
{% endif %}
Note
The following Liquid tags are not supported:
tablerowliquidechorenderinclude
Fields with Multiple Values
Depending on where an incident is in its lifecycle, the following fields can contain more than one value (that is, in an array):
- Status updates,
incident.previous_status_updates - Impacted business services,
incident.impacted_business_services - Impacted technical services,
incident.impacted_services - Acknowledgements,
incident.acknowledgements - Assignments,
incident.assignments - Teams,
incident.teams
Since these items are stored in an array, you might need to provide an index to access the values of their properties. For example, {{incident.previous_status_updates[0].message}} displays the first status update associated with the incident.
Alternatively, use a for loop to display all values stored in an array. The following example iterates through all status updates associated with an incident:
{% for update in incident.previous_status_updates %}
  {{update.message}}
{% endfor %}
You can also access more than one of the properties associated with the update variable. For example, you can include the time of a status update with the message:
{% for update in incident.previous_status_updates %}
  {{update.created_at}} — {{update.message}}
{% endfor %}
Additionally, you can display only the most recent status update and its creation time. Status updates are sorted by date and time in descending order, so you can use Liquid's first syntax to display only the most recent update:
{% assign update = incident.previous_status_updates | first %}
{{update.created_at}} — {{update.message}}
For more information, refer to the Liquid templating language documentation.
Edit a Template in the Web App
- Navigate to Incidents Status Update Templates.
- Click **** Edit to the right of the template you want to edit.
- Edit the template as desired.
- Click Save.
Duplicate a Template in the Web App
- Navigate to Incidents Status Update Templates.
- Click **** Duplicate to the right of the template you want to duplicate.
- Enter the following information in the fields provided, then click Duplicate Template:
| Field | Value |
|---|---|
| Name | Enter a new name for the template. |
| Description (optional) | Enter a new description for the template. |
Delete a Template in the Web App
- Navigate to Incidents Status Update Templates.
- Click **** Delete to the right of the template you want to delete.
- In the confirmation modal, click Delete. This action is irreversible and cannot be undone.
Use a Status Update Template During Incident Response
- Navigate to the incident detail page.
- Select the Status Updates tab.
- Click New Update.
- Select a communication template from the dropdown.
- Click Preview.
- (Optional) If necessary, adjust the pre-populated text in the Message field. Adjustments made in the Message field also reflect in the email body.
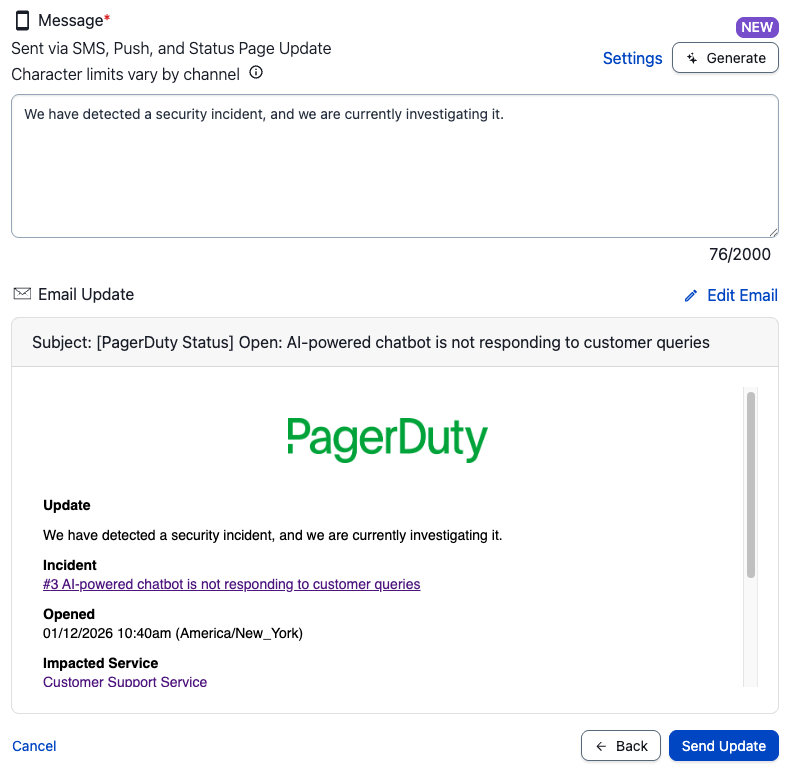 Status Update Template
- Click Send Message to notify incident subscribers.
Requirement
The email Subject has a maximum of 255 characters. A status update notification containing more than the maximum character length returns the following error message:
There is a problem with this template. Please report this problem to your account administrator.
If this occurs, you can click Edit Email to adjust the Subject.
FAQ
Custom Fields