Incident Management
Incident Roles
Define responder roles and responsibilities for efficient incident management.
Incident roles allow you to customize a set of roles that you can assign during an incident. An established set of incident roles clearly defines incident responsibilities, promotes accountability, and enables efficient response.
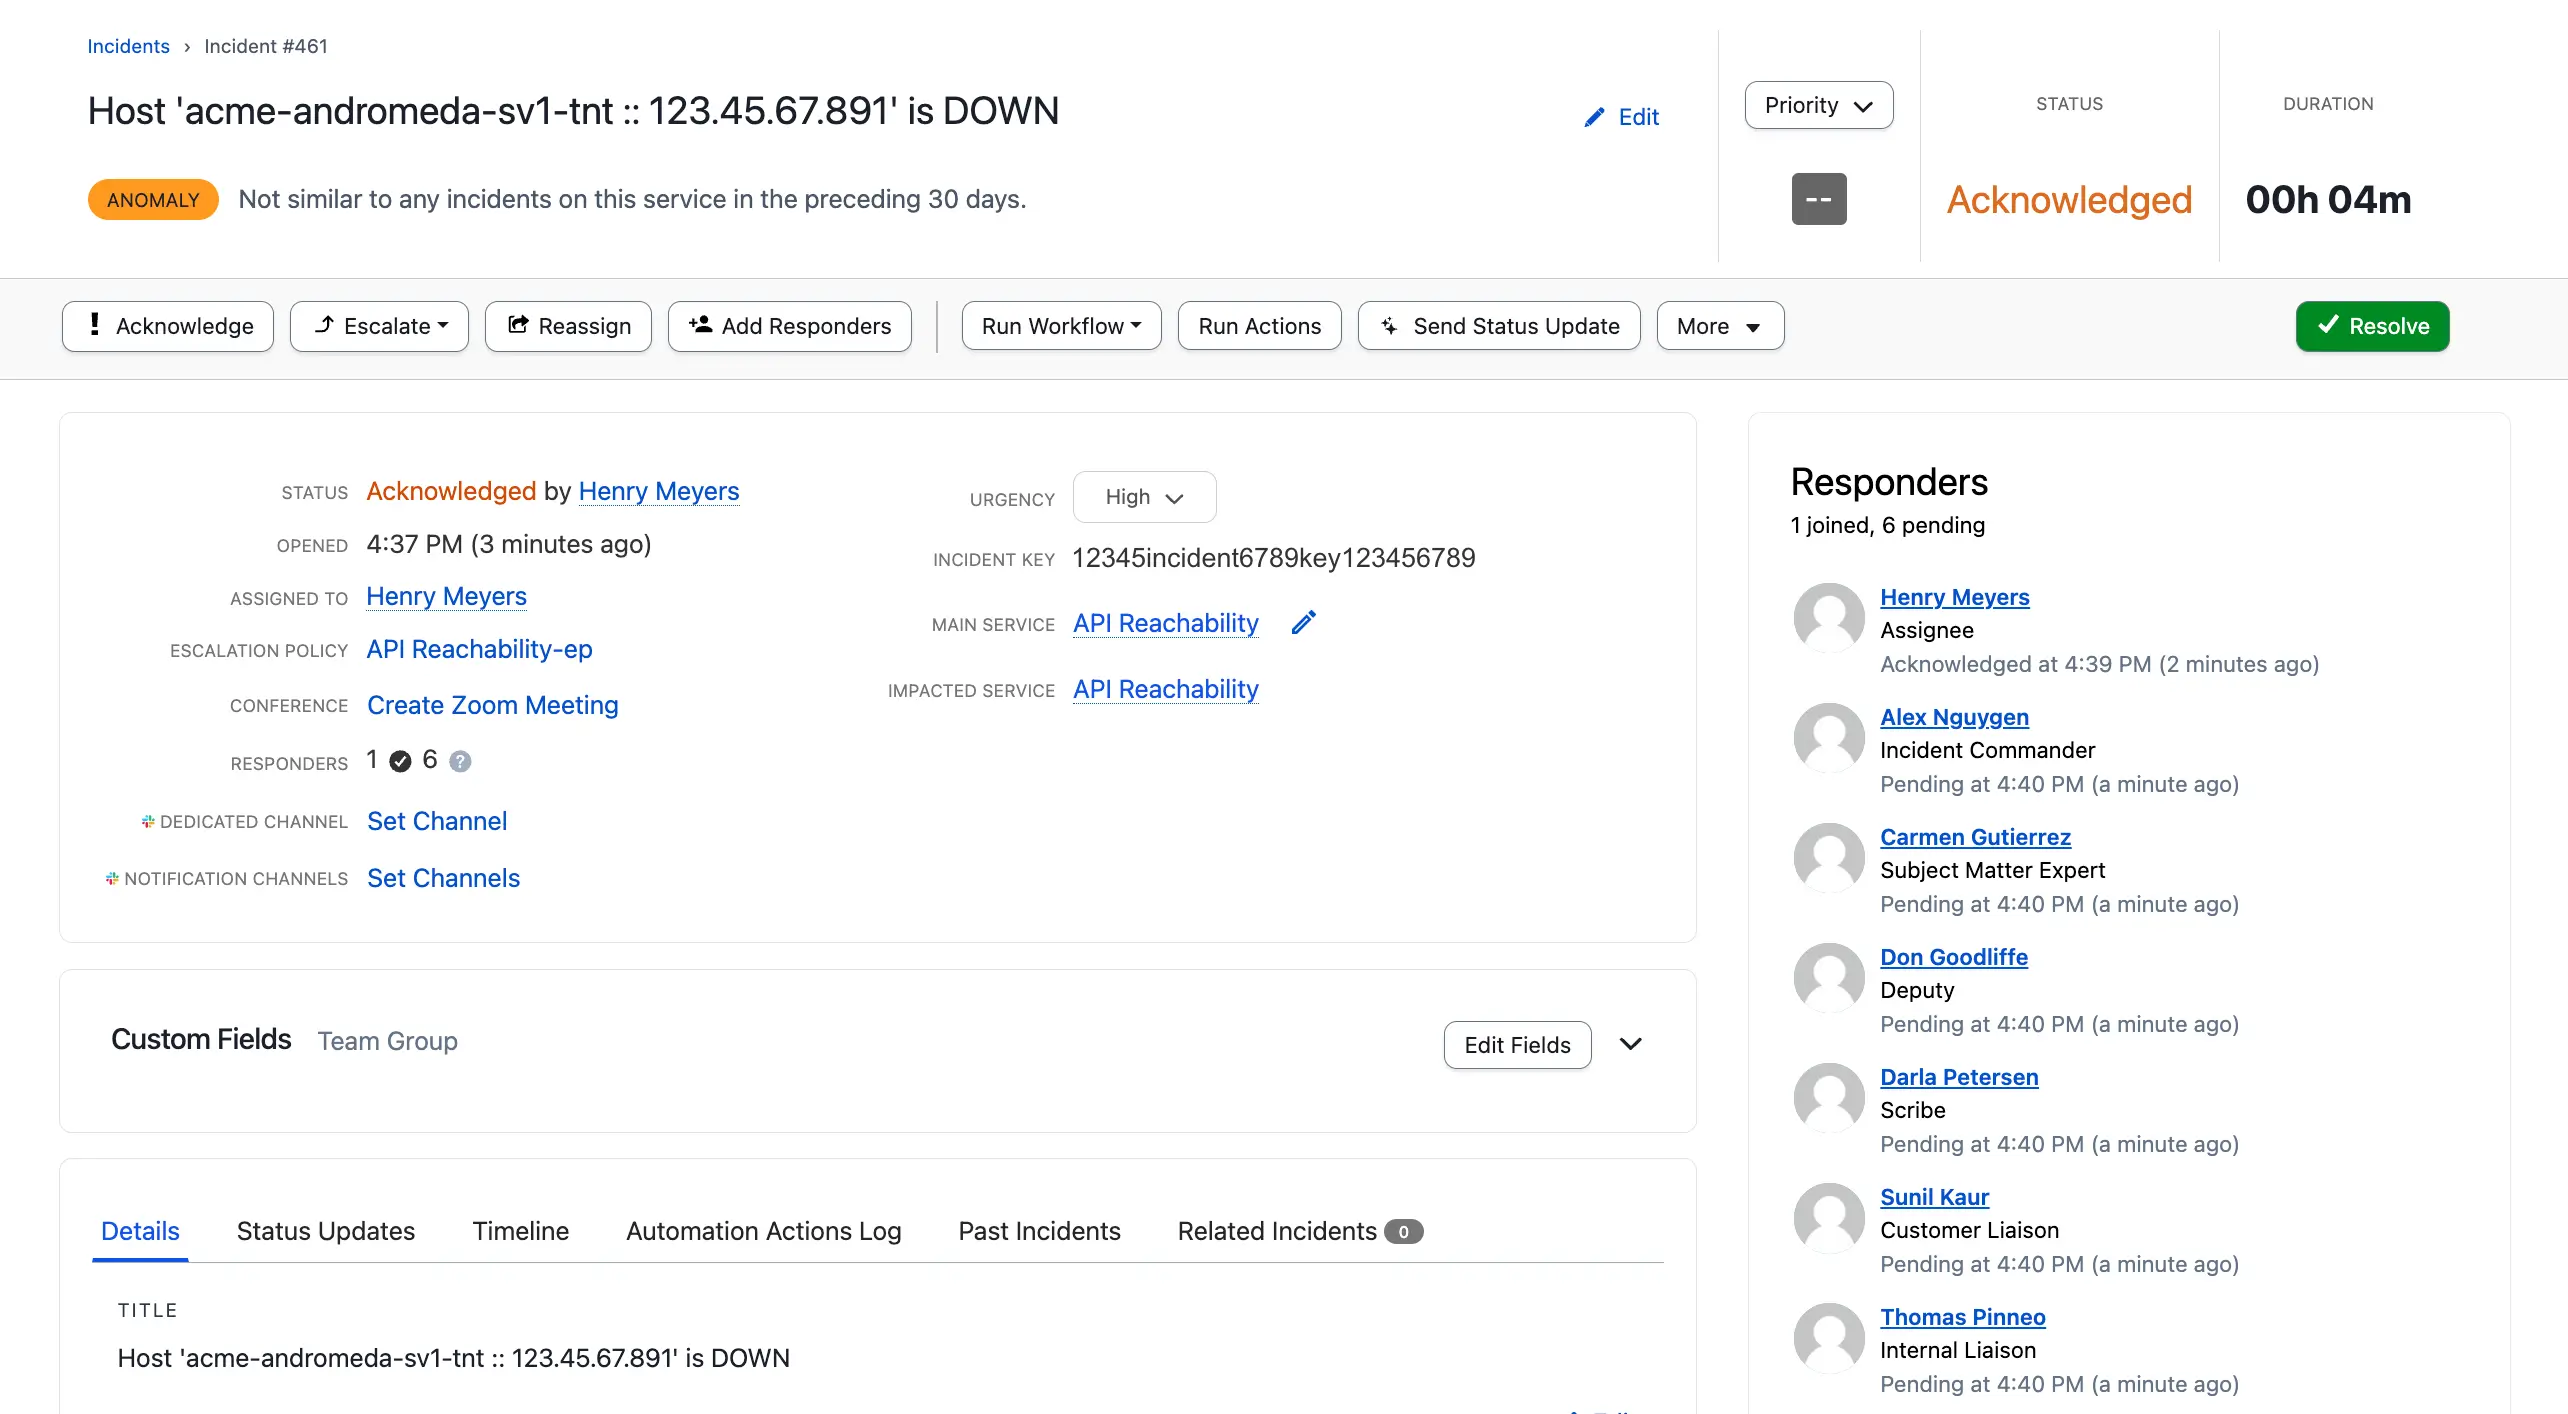 Incident Roles in Responders list
Availability by Plan
| Role Type | Professional | Business | Enterprise |
|---|---|---|---|
| Predefined Roles (Incident Commander, Customer Liaison) | :heavy_check_mark: | :heavy_check_mark: | :heavy_check_mark: |
| Custom Roles | one | 10 (for a total of 12 incident roles) |
Contact the Sales Team to upgrade or expand your incident roles feature set.
Incident Response Guide
Default Incident Roles
There are two default incident roles:
- Incident Commander
- Customer Liaison
Your account plan determines whether these roles are available. You can enable these roles to use them on incidents. For detailed configuration steps, see Enable or Disable Incident Roles.
 Incident roles
Create Incident Roles
Required User Permissions
Note
-
Navigate to Incidents Incident Roles.
-
Click New Role.
-
On the New Role screen, complete the following fields and click Create Role:
Field Description Display Name A role name to display on incidents. Role Name A unique name for API use. This name can contain only lowercase letters, numbers, and underscores.
Note: You cannot change the Role Name after role creation.Description Help responders understand the scope of the role and how they should use it. Disable Incident Role Select Enable or Disable. Disabling a role removes it from future incidents. Existing incident roles and assignees remain unaffected.
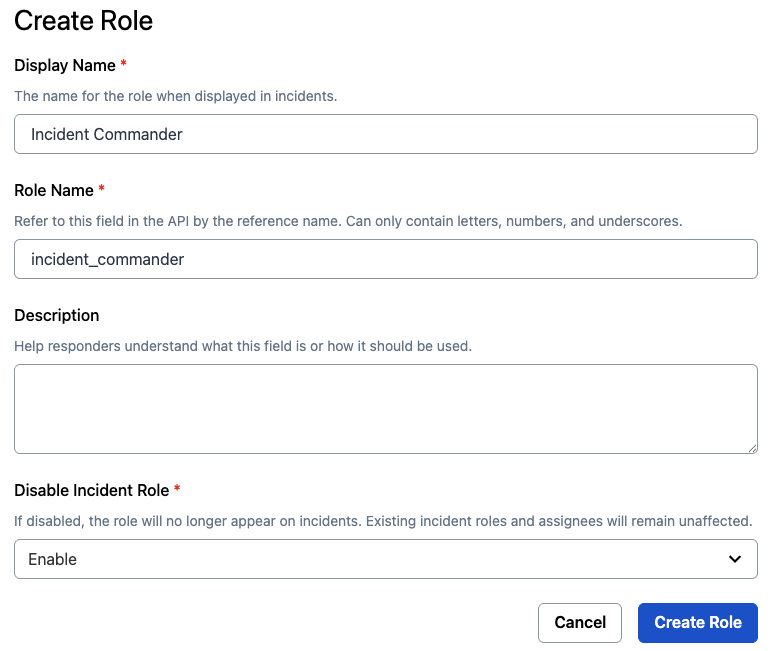 Create role modal
Edit Incident Roles
-
Navigate to Incidents Incident Roles.
-
Click the role you want to edit.
-
On the edit screen, modify the details using the following fields and click Save Changes:
Field Description Display Name Edit the role name. Description Edit the description to help responders understand the scope of the role and how they should use it. Disable Incident Role Select Enable or Disable depending on your preference. If disabled, the role no longer appears on incidents. Existing incident roles and assignees remain unaffected.
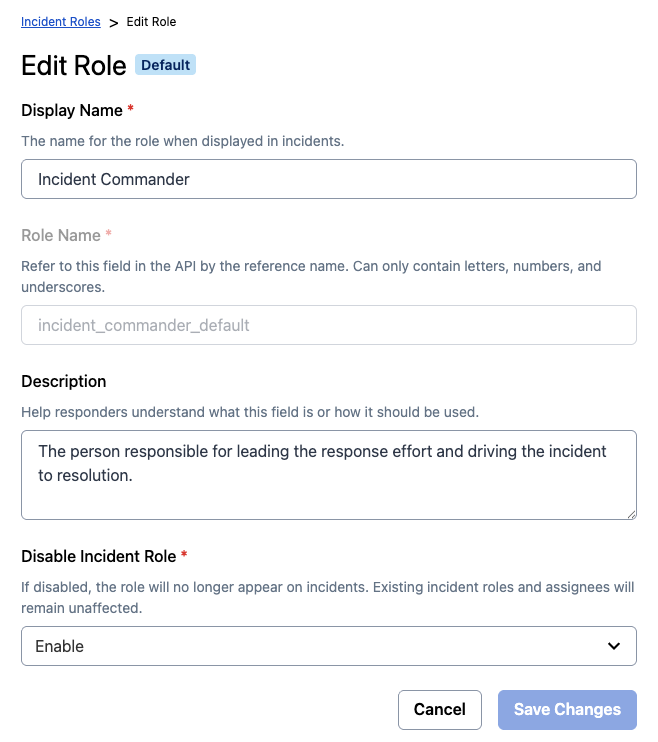 Edit incident roles
Enable or Disable Incident Roles
To enable or disable an existing incident role:
- Navigate to Incidents Incident Roles.
- In the Ellipsis Icon () overflow menu next to the role you want to disable or enable, click Enable or Disable.
Delete Incident Roles
Deletion Warning
- Navigate to Incidents Incident Roles.
- In the Ellipsis Icon () overflow menu next to the role you want to delete, click Delete.
- In the confirmation modal, type Delete in the text box and click Delete.
Assign an Incident Role
Once you create an incident role, you can assign the role to an incident responder.
Behavior When You Assign Roles to Non-Responders
You can assign an incident role in multiple ways: