AI & Automation
Workflow Integrations
Some Workflow Actions rely on a type of integration called Workflow Integrations to connect Incident Workflows to external tools. Workflow Integrations support authentication via API keys or OAuth, letting incident response teams and administrators connect PagerDuty to the tools they use during a response.
Note
API Key vs. OAuth Authentication
Tools that use OAuth redirect you to the provider's own login or authorization page to complete the connection. Tools that use API keys or tokens require you to generate a credential in the external tool and enter it directly into PagerDuty.
Workflow Integrations are supported with the following tools:
- AWS
- Azure Functions
- Confluence
- Datadog
- Dynatrace
- Elasticsearch
- GitHub
- Logz.io
- Jeli
- Linear
- Microsoft Entra ID (Azure AD))
- New Relic
- PagerDuty Runbook Automation
- ServiceNow
- Slack Bot Integration
- Splunk
- Sumo Logic
- Web API
Warning
Required Permissions
If you have one of the following base roles, you can add, update, and delete Workflow Integration connections:
- Manager
- Admin
- Account Owner
Create a Workflow Integration
Workflow Integrations securely store connection credentials.
- In the PagerDuty web app, navigate to Integrations Workflow Integrations.
- Click Add Connection to the right of your preferred tool.
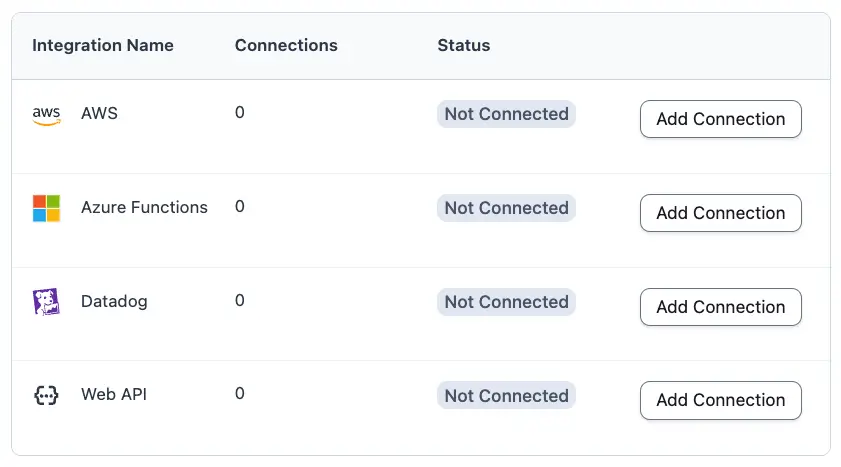
-
Expand the section that corresponds to your preferred technology and enter the requested information:
a. AWS
Overview
This section guides you through configuring an AWS connection for PagerDuty Incident Workflows by assuming an AWS Identity and Access Management (IAM) role along with an external ID. This secure, credential-less authentication method allows PagerDuty to access your AWS resources without requiring long-lived access keys.
Prerequisites
- AWS account with permissions to create IAM roles and policies.
- PagerDuty account with admin or global managers permissions.
- Basic familiarity with AWS IAM concepts.
Architecture
The integration uses AWS IAM role assumption with these key components:
Step 1: Initiate Connection Setup in PagerDuty
- Navigate to Automation Incident Workflows Workflow Integrations in PagerDuty.
- For AWS, click Add Connection. The "Add AWS Connection" modal appears with the following information:
- Account ID: PagerDuty's AWS account
- External ID: A unique identifier (for example,
da399432e33cd15616a59a08f523ac65)
Step 2: Create an IAM Role in AWS
Step 2.1: Open IAM Console
- Sign in to the AWS Management Console.
- Navigate to IAM (Identity and Access Management).
- Select Roles from the left navigation.
- Click Create role.
Step 2.2: Configure Trust Relationship
- Select AWS account as the trusted entity type.
- Choose Another AWS account.
- Enter the Account ID copied from PagerDuty.
- Select the Require external ID checkbox.
- Enter the External ID copied from PagerDuty.
- Click Next.
Example Trust Policy JSON (visible in JSON editor):
{
  "Version": "2012-10-17",
  "Statement": [
    {
      "Effect": "Allow",
      "Principal": {
        "AWS": "arn:aws:iam::<<account ID copied from PagerDuty>>:root"
      },
      "Action": "sts:AssumeRole",
      "Condition": {
        "StringEquals": {
          "sts:ExternalId": "<<external ID copied from PagerDuty>>"
        }
      }
    }
  ]
}
Note
Note
Replace the
External IDwith your actual value from PagerDuty.Step 3: Attach Permissions Policy
Select permissions based on the actions your workflows perform. You can attach AWS-managed policies, create custom policies, or use a combination.
Option A: Start with Read-Only Access (Recommended for Testing)
For initial setup and testing, start with minimal permissions:
- On the Add permissions page, search for
ReadOnlyAccess. - Select the ReadOnlyAccess AWS-managed policy.
- Click Next.
Option B: Create Custom Policy for Specific Actions
For production use, grant only the permissions necessary for your workflows.
Example: CloudWatch Logs Access
{
  "Version": "2012-10-17",
  "Statement": [
    {
      "Effect": "Allow",
      "Action": [
        "logs:DescribeLogGroups",
        "logs:DescribeLogStreams",
        "logs:GetLogEvents",
        "logs:FilterLogEvents"
      ],
      "Resource": "*"
    }
  ]
}
Example: Lambda Function Management
{
  "Version": "2012-10-17",
  "Statement": [
    {
      "Effect": "Allow",
      "Action": [
        "lambda:ListFunctions",
        "lambda:GetFunction",
        "lambda:InvokeFunction"
      ],
      "Resource": "*"
    }
  ]
}
Common Workflow Actions and Required Permissions
Step 4: Name and Review the Role
- Enter a Role name (for example,
PagerDuty-IncidentWorkflows-Role). - (Optional) Add a Description (for example, "Allows PagerDuty Incident Workflows to perform automated actions in AWS").
- Add Tags if your organization requires them.
- Review the trust policy and permissions.
- Click Create role.
Step 4.1: Copy the Role ARN
- After creating the role, view your new role in the roles list.
- Click the role name to view its details.
- Copy the ARN from the summary section. Format:
arn:aws:iam::123456789012:role/PagerDuty-IncidentWorkflows-Role
Step 5: Complete the Configuration in PagerDuty
-
Return to PagerDuty's Add AWS Connection modal and complete the following fields:
-
Click Add.
Step 6: Verify the Connection
PagerDuty automatically verifies the connection by assuming the IAM role you configured.
Check Connection Status
- Navigate to Automation Incident Workflows Workflow Integrations AWS.
- Locate your connection in the connections table.
- Check the Status column:
- Healthy: PagerDuty successfully assumed the role and can use this connection.
- Unhealthy: PagerDuty cannot assume the role. Refer to the troubleshooting instructions in the following section. The status is checked automatically when the connection is created and periodically thereafter.
Steps to Troubleshoot If Status Shows "Unhealthy"
Verify the following in AWS:
After making corrections in AWS, the status updates automatically within a few minutes. You can also edit the connection in PagerDuty to trigger an immediate verification check.
b. Azure Functions
c. Confluence
- After you select Add Connection, provide a Connection Name. If you use Confluence with the SRE Agent, select Allow SRE Agent Access. For more on configuring Confluence with the SRE Agent, see Agent Tooling Configuration.
- Click Add. The app navigates to a page to connect PagerDuty with Confluence.
- Select the specific Confluence site to integrate.
- Click Accept.
d. Datadog
e. Dynatrace
OAuth2 client permissions (connection and health check)
PagerDuty validates the connection by requesting an OAuth2 access token from Dynatrace:
- Token endpoint:
https://sso.dynatrace.com/sso/oauth2/token - Grant type:
client_credentials - Scopes used by the integration (default):
storage:logs:readandstorage:buckets:read(space-separated). Your OAuth client in Dynatrace must allow these scopes.
If you provide OAuth2 Account UUID, PagerDuty includes a resource parameter (
urn:dtaccount:{uuid}) on the token request so the token is scoped to your account. See Dynatrace access tokens and OAuth clients.Dynatrace environment API token permissions
Some environments use a Dynatrace environment API token instead of OAuth2 for API calls. For the Dynatrace: Search Logs action, PagerDuty calls the Grail query APIs on your Environment URL (
POST …/platform/storage/query/v1/query:executeand polling on…/query:poll).Apply least privilege in Dynatrace:
- Minimum scopes for log search (typical):
storage:logs:readandstorage:buckets:read— align with the OAuth scopes used by the integration and sufficient for standardfetch logsstyle DQL against Grail log data. - Broader DQL: If your queries read other Grail record types (for example spans, events, metrics), add the matching
storage:*:readscopes for those types. See Add permission scopes to use Dynatrace APIs and Permissions in Grail. - Network: Your Environment URL must be reachable from PagerDuty over HTTPS.
f. Elasticsearch
API Key Permissions
Create an API key in Elasticsearch with least privilege for what your workflows need.
- Saving the connection — PagerDuty sends an authenticated GET request to the Elasticsearch URL you provide. The API key must authenticate successfully. If Elasticsearch returns 401 or 403, the connection cannot be created or fails health checks.
- Elasticsearch: Search Logs — The action calls:
POST /{index_pattern}/_searchfor Lucene, KQL, and Query DSL query types, andPOST /{index_pattern}/_eql/searchfor EQL.
The API key must have permission to search (read) the indices that match every Index Pattern you use in workflows (for example
logs-*,filebeat-*). Tighten names to only the patterns you need.- Example — API key with restricted index read access — Your Elasticsearch admin can create a key using the Create API key API. The following is an example only; adjust cluster and index names to your environment:
POST /_security/api_key
{
  "name": "pagerduty-incident-workflows",
  "role_descriptors": {
    "pagerduty_elasticsearch_read": {
      "cluster": ["monitor"],
      "indices": [
        {
          "names": ["logs-*", "filebeat-*"],
          "privileges": ["read"]
        }
      ]
    }
  }
}
"cluster": ["monitor"]in the example — Helps compatibility with cluster-level checks; some hosted deployments differ — confirm with your Elastic version and security policy."privileges": ["read"]on the indices in the example — Includes search/read on the listed patterns. If certain queries fail (for example metadata or field mapping), your admin can addview_index_metadataper Elasticsearch index privileges. Use HTTPS, rotate API keys periodically, and avoid granting broader index wildcards than necessary. When you save the connection, PagerDuty validates the URL and API key. If the URL is wrong, the key is invalid, or your network or firewall blocks PagerDuty from reaching the cluster, the connection cannot be created.
g. GitHub
- After you select Add Connection, provide a Connection Name and click Add. The app navigates to a page to connect PagerDuty with GitHub.
- If you use GitHub with the SRE Agent, select Allow SRE Agent Access. For more on configuring GitHub with the SRE Agent, see Agent Tooling Configuration.
- Select the specific GitHub organizations to integrate.
- Click Authorize, then click Continue.
- Review the details and then select Authorize pd-incident-workflows-integration.
h. Grafana
i. Jeli
j. Linear
k. Logz.io
l. Microsoft Entra ID (Azure AD)
The system directs you to Microsoft's login page. Follow the on-screen prompts to complete the Workflow Integration.
m. New Relic
n. PagerDuty Runbook Automation
o. ServiceNow
How PagerDuty validates the connection
When you save the connection, PagerDuty requests an OAuth access token from your instance at:
POST {instance}/oauth_token.dousing the Resource Owner Password Credentials grant (grant_type=password) with your client_id, client_secret, username, and password. If ServiceNow returns a non-success response, the connection cannot be created (or health checks fail). Error text from ServiceNow can appear in the connection error when available.ServiceNow-side setup and permissions
Your ServiceNow administrator must configure the instance so the integration can authenticate and so workflow actions can read Knowledge data.
- OAuth application — Create or use an OAuth API endpoint/application on the instance that allows the password grant (the same parameters PagerDuty sends above). Follow your ServiceNow release documentation for creating OAuth applications and client credentials.
- Integration user — The ServiceNow Username must be able to complete the password grant and must have rights appropriate for the workflow actions you run (at minimum, for Retrieve Runbook from Knowledge Base Article, read access to Knowledge content via the Table API).
- Tables and APIs used by Retrieve Runbook — The action calls ServiceNow Table API endpoints, including:
sn_km_mr_st_kb_knowledge— primary article payload (number, short description, content, author, sys_id, and related fields). This table is part of ServiceNow Managed Knowledge capabilities; confirm with your admin that it exists and is licensed on your instance.kb_knowledge— supplemental fields (knowledge base, workflow state, last updated metadata).sys_attachment(attachment API) — optional attachment metadata when Include Attachments is enabled (JSON metadata only; binary files are not downloaded).
Exact role names vary by instance, plugins, and ACLs. Your admin should grant the integration user read access to these tables (and REST access) consistent with your security model. See ServiceNow's Table API and your internal OAuth setup guides.
- Network — The ServiceNow instance must be reachable from PagerDuty. Use HTTPS in production.
When you save the connection, PagerDuty validates credentials as described. If the URL is wrong, OAuth settings do not match your instance, the user cannot authenticate, or your network or firewall blocks PagerDuty, the connection cannot be created.
p. Slack Bot Integration
The system directs you to Slack's authentication page. Follow the on-screen prompts to complete the Workflow Integration.
q. Splunk
r. Sumo Logic
s. Web API
-
In the field Who can edit or select the connection, select All admins and global managers (default) or All admins, global managers team managers on specific teams. If you choose All admins, global managers team managers on specific teams, select one or more Teams from the Select teams dropdown.
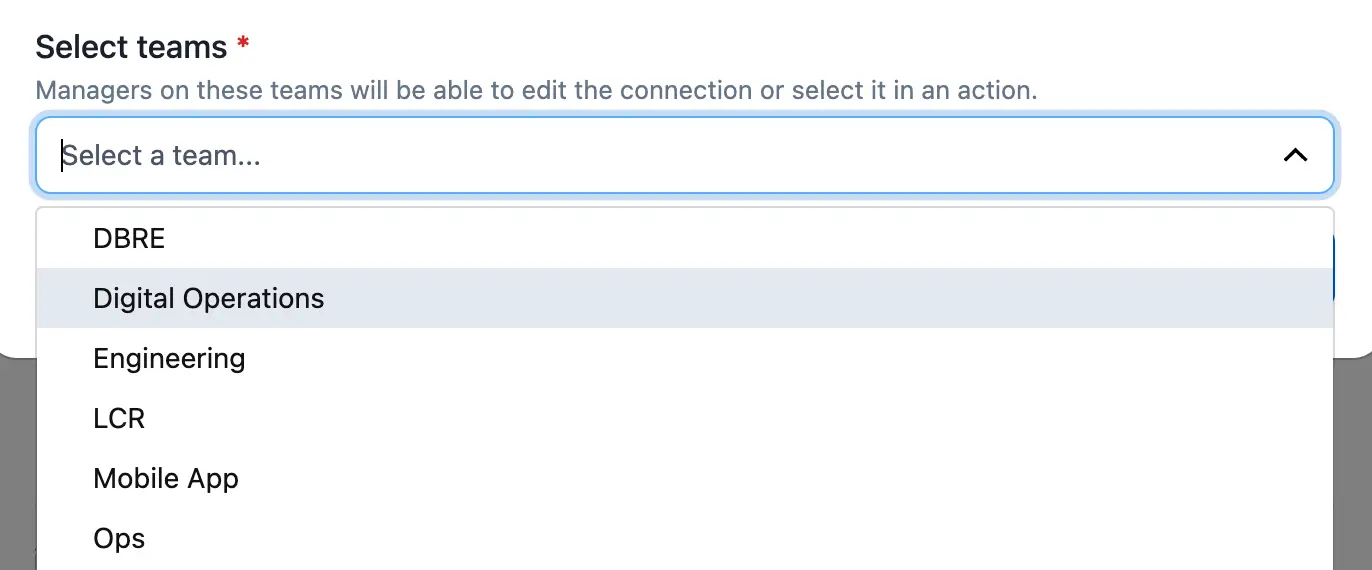
Note
Permission Scope
This setting affects which users can edit the connection or select the connection when configuring actions in an Incident Workflow. This setting does not affect who can invoke an Incident Workflow; that setting is administered while creating or editing an Incident Workflow.
- Click Add.
Delete a Workflow Integration
- In the web app, navigate to Integrations Workflow Integrations.
- Click the Integration Name (for example, AWS, Azure Functions) that contains the connection you want to delete.
- To the right of the connection you want to delete, click Delete.
- In the confirmation modal, click Delete. This action cannot be undone.
Use a Workflow Integration in Incident Workflows
Creating a Workflow Integration allows you to use specific tool-specific Incident Workflow Actions. Read Incident Workflows for more information.